

Although Visual Basic 2010 is generally a programming language
designed for creating business and other industrial applications and not
for creating animation, it can be used to create animation. In this
lesson, we will show you just that.
28.1 Moving an object
Now, click on the buttons and key in the following code:
Private Sub MoveDownBtn_Click(ByVal sender As System.Object, ByVal e As System.EventArgs) Handles MoveDownBtn.Click
PictureBox1.Top = PictureBox1.Top + 10
End Sub
Private Sub MoveLeftBtn_Click(ByVal sender As System.Object, ByVal e As System.EventArgs) Handles MoveLeftBtn.Click
PictureBox1.Left = PictureBox1.Left – 10
End Sub
Private Sub MoveRightBtn_Click(ByVal sender As System.Object, ByVal e As System.EventArgs) Handles MoveRightBtn.Click
PictureBox1.Left = PictureBox1.Left + 10
End Sub
Explanation:
Each time the user clicks on the Move Down button, the distance of the PictureBox increases by 10 pixels from the top border, creating a downward motion. On the other hand, each time the user clicks on the Move Up button, the distance of the PictureBox decreases by 10 pixels from the top borders, thus creating an upward motion. In addition, each time the user clicks on the Move Left button, the distance of the PictureBox decreases by 10 pixels from the left border, thus creating a leftward motion. Lastly, each time the user clicks on the Move Right button, the distance of the PictureBox increases by 10 pixels from the left border, thus creating an rightward motion.
28.2 Creating Animation using Timer
We can create continuous animation using timer without the need to manually clicking a command button. We can create left to right or top to bottom motion by writing the necessary code.
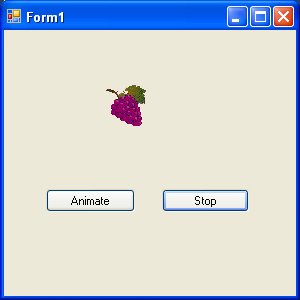
First of all, insert a PictureBox into the form. In the PictureBox properties window,select the image property and click to import an image file from your external sources such as your hard drive, your Pendrive or DVD. We have inserted an image of a bunch of grapes.Next, insert a Timer control into the form set its interval property to 100, which is equivalent to 0.1 second. Finally, add two command button to the form, name one of them as AnimateBtn and the other one as StopBtn, and change to caption to Animate and Stop respectively.
We make use of the Left property of the PictureBox to create the motion. PictureBox.Left means the distance of the PictureBox from the left border of the Form . Now click on the Timer control and type in the following code:
Private Sub Timer1_Tick(ByVal sender As System.Object, ByVal e As System.EventArgs) Handles Timer1.Tick
If PictureBox1.Left < Me.Width Then
PictureBox1.Left = PictureBox1.Left + 10
Else
PictureBox1.Left = 0
End If
End Sub
In the code above, Me.Width represents the width of the Form. If the distance of the PictureBox from the left is less than the width of the Form, a value of 10 is added to the distance of the PictureBox from the left border each time the Timer tick, or every 0.1 second in this example. When the distance of the PictureBox from the left border is equal to the width of the form, the distance from the left border is set to 0, which move the PictureBox object to the left border and then move left again, thus creates an oscillating motion from left to right. We need to insert a button to stop motion. The code is:
Timer1.Enabled = False
To animate the PictureBox object, we insert a command button and key in the following code:
Timer1.Enabled = True
The Image of the Animation program is shown below:
28.1 Moving an object
In this section, we will show you how to move an object by pressing a
command button. You need to make use of the Top and Left properties of
an object to create animation. The Top property defines the distance of
the object from the top most border of the screen while the Left
property defines the distance of the object from leftmost border of the
screen. By adding or subtracting the distance of the object we can
create the animated effect of moving an object.
Start a new project and name it as Movable Object, or any name you
wish. Now insert a PictureBox and in its Image property import a picture
from your hard drive or other sources. Next, insert four command
buttons, change their captions to Move Up, Move Down, Move Left and Move
Right. Name them as MoveUpBtn, MoveDowbBtn, MoveLeftBtn and
MoveRightBtn.
Private Sub MoveDownBtn_Click(ByVal sender As System.Object, ByVal e As System.EventArgs) Handles MoveDownBtn.Click
PictureBox1.Top = PictureBox1.Top + 10
End Sub
Private Sub MoveLeftBtn_Click(ByVal sender As System.Object, ByVal e As System.EventArgs) Handles MoveLeftBtn.Click
PictureBox1.Left = PictureBox1.Left – 10
End Sub
Private Sub MoveRightBtn_Click(ByVal sender As System.Object, ByVal e As System.EventArgs) Handles MoveRightBtn.Click
PictureBox1.Left = PictureBox1.Left + 10
End Sub
Explanation:
Each time the user clicks on the Move Down button, the distance of the PictureBox increases by 10 pixels from the top border, creating a downward motion. On the other hand, each time the user clicks on the Move Up button, the distance of the PictureBox decreases by 10 pixels from the top borders, thus creating an upward motion. In addition, each time the user clicks on the Move Left button, the distance of the PictureBox decreases by 10 pixels from the left border, thus creating a leftward motion. Lastly, each time the user clicks on the Move Right button, the distance of the PictureBox increases by 10 pixels from the left border, thus creating an rightward motion.
The interface is shown below:

We can create continuous animation using timer without the need to manually clicking a command button. We can create left to right or top to bottom motion by writing the necessary code.
First of all, insert a PictureBox into the form. In the PictureBox properties window,select the image property and click to import an image file from your external sources such as your hard drive, your Pendrive or DVD. We have inserted an image of a bunch of grapes.Next, insert a Timer control into the form set its interval property to 100, which is equivalent to 0.1 second. Finally, add two command button to the form, name one of them as AnimateBtn and the other one as StopBtn, and change to caption to Animate and Stop respectively.
We make use of the Left property of the PictureBox to create the motion. PictureBox.Left means the distance of the PictureBox from the left border of the Form . Now click on the Timer control and type in the following code:
Private Sub Timer1_Tick(ByVal sender As System.Object, ByVal e As System.EventArgs) Handles Timer1.Tick
If PictureBox1.Left < Me.Width Then
PictureBox1.Left = PictureBox1.Left + 10
Else
PictureBox1.Left = 0
End If
End Sub
In the code above, Me.Width represents the width of the Form. If the distance of the PictureBox from the left is less than the width of the Form, a value of 10 is added to the distance of the PictureBox from the left border each time the Timer tick, or every 0.1 second in this example. When the distance of the PictureBox from the left border is equal to the width of the form, the distance from the left border is set to 0, which move the PictureBox object to the left border and then move left again, thus creates an oscillating motion from left to right. We need to insert a button to stop motion. The code is:
Timer1.Enabled = False
To animate the PictureBox object, we insert a command button and key in the following code:
Timer1.Enabled = True
The Image of the Animation program is shown below:
0 comments :
Post a Comment