

<Previous Lesson> <<Home>>
40.1 A brief introduction to reporting tool in Visual basic 6
You have learned how
to build a database in Visual Basic 6 in previous chapters, however you
have not learned how to display the saved data in a report.
Reports are important and useful in many respects because they provide
useful and meaningful information concerning a set of data. In this
chapter, we will show you how to create a report in Visual Basic 6.
In previous versions of Visual Basic 6, there is
no primary reporting . Previous versions of Visual basic 6 uses Crystal
Reports tool, a software from Seagate. Fortunately, Microsoft has
integrated a good report writer into Visual Basic 6, so you no longer
need to use Crystal Report.
40.2 Steps in building your report in Visual Basic 6
Visual Basic 6 provides you with a data report designer to create your report, it is somewhat similar to data report designer in Microsoft Access. The data report designer has
its own set of controls which allow you to customize your report
seamlessly. The steps in creating the report in VB6 are listed below:
Step 1: Adding Data Report
Start Visual Basic as a Standard EXE project. From the Project menu in the VBE, select Add Data Report
in the dropdown menu. Now, you will be presented with the data report
environment, as shown in Figure 40.1. The data report environment
contains six controls, they are RptTextBox, RptLine, RptFunction, RptLabel, RptImage and RptShape.
You
can customize your report here by adding a title to the page header
using the report label RptLabel. Simply drag and draw the RptLabel
control on the data report designer window and use the Caption property
to change the text that should be displayed.
You can also add graphics to the report using the RptImage control.
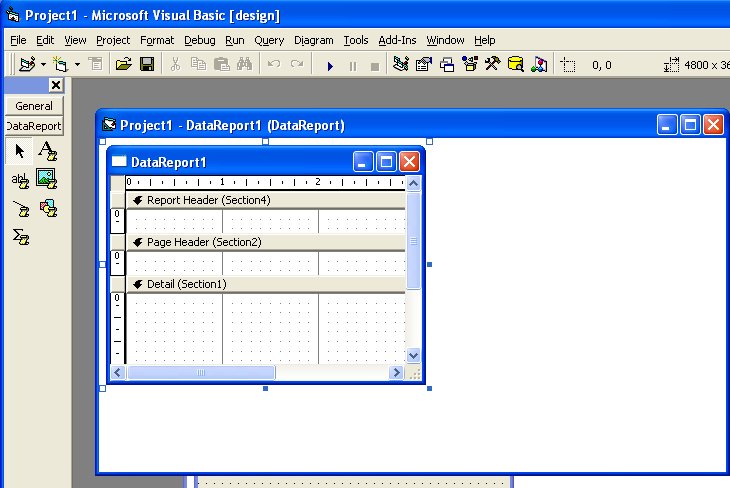
Figure 40.1: The Data Report Environment
Step 2: Connecting the report to database using Data Environment Designer
Click the Project menu, then select Data Environment.
from the drop-down menu. The default data environment will appear, as shown in figure 40.2
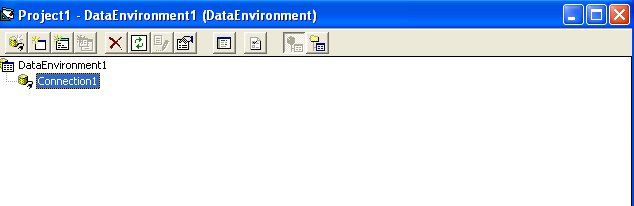
Figure 40.2: Data Environment
Now, to connect to the database, right-click connection1 and select
Microsoft Jet 3.51 OLE DB Provider (as we are using MS Access database) from the
Data Link Properties dialog (as shown in Figure 40.3), then click next.
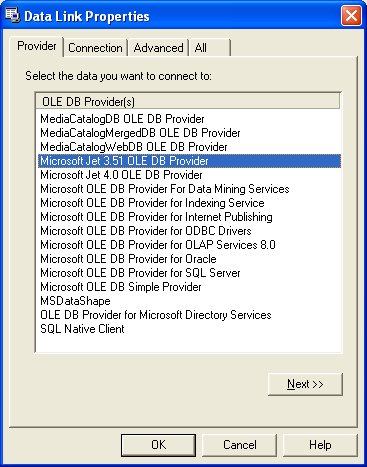
Figure 40.3
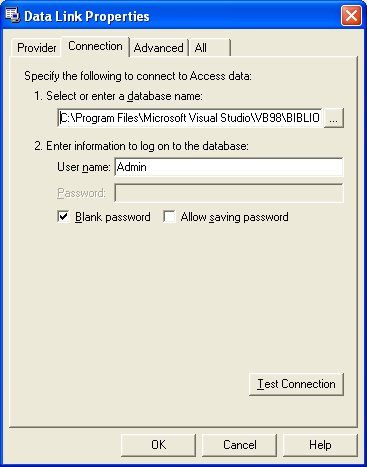
Figure 40.4
Step 3: Retrieving Information from the Database
In order to use the database in your report, you
need to create query to retrieve the information from the database. Here
, we will use SQL command to create the query. First of all, right
click on MyConnection to add a command to the data environment. The
default command is Command1, you can rename it as MyCommand, as shown in
Figure 40.5.
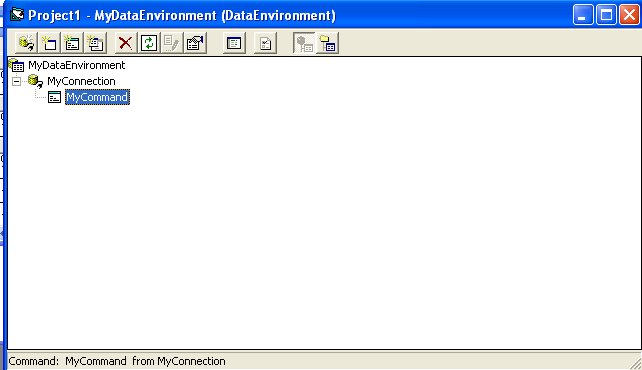
Figure 40.5: MyCommand
In order to use SQL command, right-click MyCommand
and you can see its properties dialog. At the General tab, select SQL
statement and key in the following SQL statement:
SELECT Au_ID, Author
FROM Authors ORDER BY Author
This command is to select all the fields from the Authors table in the Biblio.Mdb database. The command ORDER BY Author is to arrange the list in ascending order according to the Authors' Names.
Now, you need to customize a few properties of your
data report so that it can connect to the database. The first property
to set is the DataSource, set it to MyDataEnvironment.
Next, you need to set the DataMember property to MyCommand,as shown in Figure 40.6
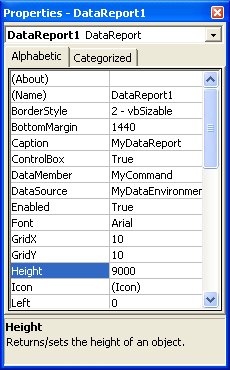
Figure 40.6: Properties of
To add data to your
report, you need to drag the fields from MyCommand in MyDataEnvironment
into MyDataReport, as shown in Figure 40.7.Visual Basic 6 will
automatically draw a RptTextBox, along with a RptLabel control for each
field on the report. You can customize the look of the labels as well as
the TextBoxes from the properties window of MyDataReport.
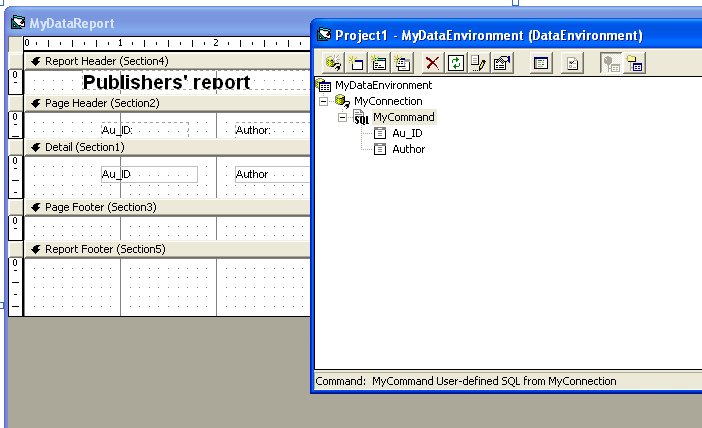
Figure 40.7
The Final step is to set
MydataReport as the Startup form from the Project menu, then run the
program. You will see your report as shown in Figure 40.8. You can print
out your report.
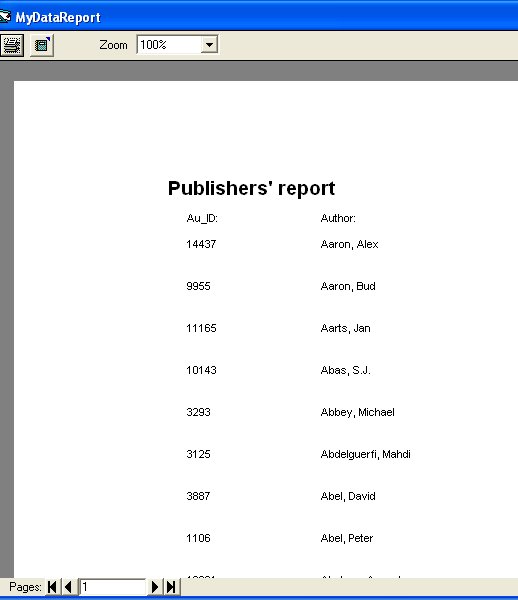
Figure 40.8: The Final Report.
Congratulation! You have finish reading all the 39 lessons, and now you
can consider yourself a VB programmer. You should consider buying the TEXTBOOK
for this tutorial for easy referencing in the future. Buy this book by clicking the picture below:
0 comments :
Post a Comment